Login / Register

Log in or register on RaspController

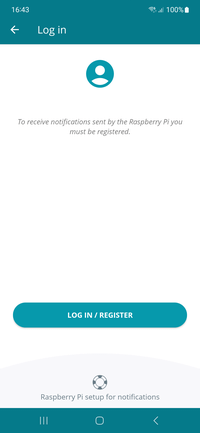
To send notifications from the Raspberry Pi to the RaspController app you need to be registered.

Then open the app, go to the “Raspberry Pi Notifications” section and register or log in.

The “Notifications” function is only available in the PRO version of the application.

From the app interface take note of the User API Key, you will need it on the Raspberry Pi to send notifications.


To send and receive notifications, both the Raspberry Pi and RaspController must be connected to the internet.

Download the library

Download and install the notification library on your Raspberry Pi

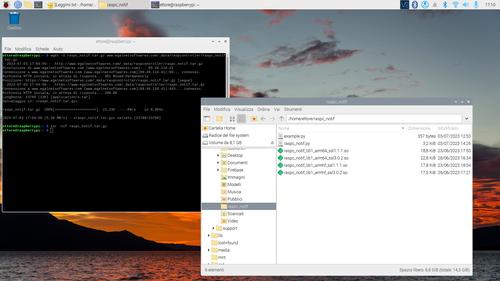
On your Raspberry Pi download the RaspController library for notifications by typing from the terminal:

wget -O raspc_notif_lib_v1.0.5.tar.gz www.egalnetsoftwares.com/_data/raspcontroller/raspc_notif_lib_v1.0.5.tar.gz

Extract the files by typing:

tar -xzf raspc_notif_lib_v1.0.5.tar.gz

Go into the folder:

cd raspc_notif_lib

Install the python library:

sudo python3 install.py

cpu_temp.py

Example of python code to send a notification when an event occurs

from raspc_notif import notif
from time import sleep
import subprocess


#Enter the User API Key you find in the RaspController app
sender = notif.Sender(apikey = "zyiFGwzW6wYzincCHTSiROS5dwl1-l_VDmpjjpN3k_mdsYrB6vFP_RCF9t6kx_7TdYvWmQCM2")


#Infinite loop to continuously get data
while True:
	
	#Gets data once every 5 seconds
	sleep(5)
	
	#Gets the CPU temperature
	cpu_temp_str = subprocess.check_output(["cat", "/sys/class/thermal/thermal_zone0/temp"]).decode("utf-8").strip()
	cpu_temp = float(cpu_temp_str) / 1000
	
	#Check if the temperature exceeds a certain threshold
	if cpu_temp > 70:
		
		#Send notification to RaspController
		notif_message = "The CPU has reached the temperature of {0}°C".format(cpu_temp)
		notification = notif.Notification("Attention!", notif_message, high_priority = True)
		result = sender.send_notification(notification)
		
		#Check if the submission was successful
		if result.status == notif.Result.SUCCESS:
			print(result.message)
		else:
			print("ERROR: {0}".format(result.message))
			
		#Wait 6 minutes before sending a notification again
		if result.status != notif.Result.SOCKET_ERROR:
			sleep(60 * 6) 

About notifications

Setting the duration of a message

FCM usually delivers messages immediately after they are sent. However, this may not always be possible. For example, if the platform is Android, the device may be turned off, offline, or otherwise unavailable. Or FCM may intentionally delay messages to prevent an app from consuming excessive resources and negatively impacting battery life.
When this happens, FCM stores the message and delivers it as soon as possible.


Setting the priority of a message (only Android)

There are two options for assigning delivery priority to downstream messages: normal priority and high priority. While the behavior differs slightly between platforms, normal and high priority message delivery works like this:
• Normal priority. Normal priority messages are delivered immediately when the app is in the foreground. For background apps, delivery may be delayed. For less urgent messages, such as new email notifications, UI sync, or background app data sync, choose normal delivery priority.
• High priority. FCM attempts to deliver high priority messages immediately even if the device is in Doze mode. High priority messages are for time-sensitive, user-visible content.


Maximum message rate

A notification can be sent at most every 5 minutes


Text limit

The notification title must be less than 200 characters and the message body cannot exceed 1000 characters.
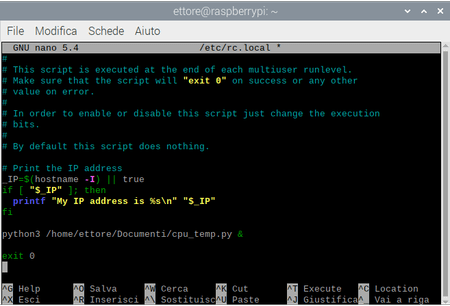
rc.local

Use rc.local to run the script on startup

1. Open the terminal and type the following command to open the rc.local file:

sudo nano /etc/rc.local

2. In the rc.local file, enter the following line of code before the “exit 0” line:

python3 /home/pi/myscript.py &

Here, replace /home/pi/myscript.py with your script name with the absolute path.
(Notice that the command ends with the ampersand (&) symbol. This to inform the system that the program we’re scheduling runs continuously, so it shouldn’t wait for your script to finish before starting the boot sequence. Do note that failing to add ampersand in the command will cause the script to run forever, and your Pi will never boot up.)

3. After that, hit CTRL + O to save the file, and then CTRL + X to close the editor.

4. Finally, enter sudo reboot.

Cron jobs

Use cron to schedule your script

Alternatively you can use cron to schedule the execution of your script (remember to remove the “while true” in your script, if present).


Install cron by running this command from the terminal:

sudo apt install cron

Once cron is installed, remember to make sure it is enabled and running using the systemctl command provided by systemd:

sudo systemctl enable cron

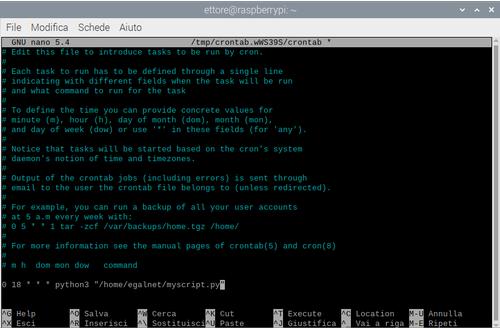
Now add a job at the end of the file by typing:

crontab -e

Use the appropriate syntax   *  *  *  *  *  user  /home/user/myscript.py
You can use the online tool for cron schedule expressions: https://crontab.guru/

Finally, hit CTRL + O to save the file, and then CTRL + X to close the editor.